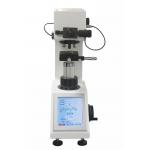
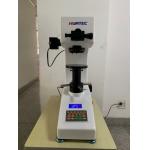
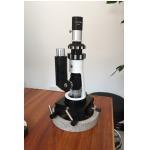
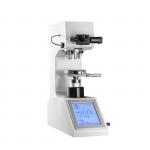
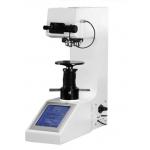
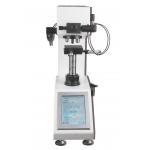
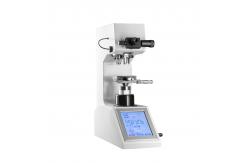
Optical Cross Guide Rail Lifting Mechanism Knook Digital Micro
Vickers Hardness Tester - Product introduction
HV-1MDT-6 automatic turret micro Vickers hardness tester is
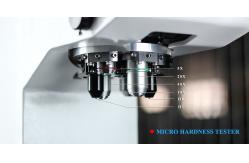
equipped with Vickers, Knoop indenter and 4 kinds of objective
lens.Vickers hardness and Knoop hardness values can be measured
simultaneously. Adopt optical cross guide rail lifting mechanism, force value is
accurate, the image is clear, is an ideal high-end micro hardness
tester. - Main features
- Installed with Vickers, Knoop head and 4 objectives;
- During the test, the indenter and the objective lens automatically
switch to each other, and the test point automatically locates
accurately.
- Lifting mechanism guided by optical cross rail ensures guiding
accuracy;Using rack and pinion two stage force transmission, can
achieve fast and smooth force transmission;
- LED light source, long life, no need to replace the bulb;
- Equipped with built-in camera, the image is clearer;
- It can be calibrated according to standard hardness blocks or
length scales, and the hardness can be corrected automatically
according to high, medium and low hardness values, so that the
hardness value is more accurate.
- 8 inch touch screen interface, easy to operate;
- Data statistics save, easy to query and print out;
- Various hardness values convert to each other;
- Test setting parameters are protected by password;
- At least 3 languages such as Chinese and English are available;
- Equipped with RS-232 interface for computer connection;
- Optional maximum test force 2kg.
- Technical parameters
| Model | HV-1MDT-6 | | Test force | 10GF (0.098N), 25GF (0.245N), 50GF (0.49N), 100GF (0.98N), 200GF
(1.96N), 300GF (2.94N), 500GF (4.9N), 1Kgf (9.8N) | | Meet standard | GB/T4340.2, GB/T 18449.2,ASTM E92 | | Measurement resolution | 0.01μm | | Data display output | 8-inch touch screen displays readings, stores 20 test results, has
a built-in printer and RS-232 interface, and an optional USB flash
drive | | Conversion scale | Rockwell, Brinell | | Hardness test range | 8 ~ 2900 HV/HK, | | Test force application method | Automatic (loading, preserving, unloading) | | Test microscope magnification | 400X, 200X, 100X, 50X (test, observation) (500X optional) | | Test force dwell time | 1-99s | | Maximum allowable specimen height | 100mm | | Distance from indenter to wall | 130mm | | X-Y platform | Size: 100*100mm Maximum movement: 25*25mm | | Size | 540*260*650mm | | Weight | About 50 kg | | Power supply | AC220V + 5%, 50 to 60 hz |
- Operation interface:
- Standard accessories:
| Item | Quantity | Item | Quantity | | Farmar shaft | 1 the root | -
| -
| | Micrometer eyepiece (DHV-1000-10X) | -
| Microhardness block (high block, medium block) | Each 1 | | -
| Nylon universal sole | 4 | - ower cord
| 1 | Spare fuse (2A) | 2 | | Product certificate, warranty card | -
| Dust cover | -
| | Printing paper | -
| - nstructions
| -
| - crewdriver
| -
| Touch pen | 1 |
HVS -- AXYZF Automatic Vickers hardness measurement and control system
Automatic loading platform Automatic focusing Automatic measuring indentation HVS-AXYZF Automatic (micro) Vickers hardness automatic control and
measurement system is a computer automatic measurement and control
system independently developed by our Company (software
registration certificate No. : 2016SR176822), and various types of
Vickers hardness tester (including micro Vickers) seamless
connection, forming a perfect set of automatic vickers hardness
tester measurement system. The automatic system composed of the system and hardness tester,
without human intervention, can achieve multi-sample, multi-point
hardness automatic measurement. X and Y move automatically; Panoromic scanning Automatic edge Z-axis automatic focusing; Automatic indentation measurement Generate inspection report automatically The automatic hardness measurement is mainly used for vickers
hardness measurement of various metals and some non-metallic
materials, and can be used for hardness measurement of various
metal parts and parts after thermal treatment.It is also suitable
for the determination of effective hardening depth, coating and
heat affected parts of welding parts.It can also be used to observe
the metallographic structure of various metal parts and collect,
display and print the image. The system is especially suitable for measuring the surface
hardness, hardness gradient distribution curve and effective
hardening depth of heat-treated workpiece. - Technical parameters
- 5-megapixel camera provides sharp images.
- Lenovo or Dell, operating system: Windows 10
- High precision automatic X-Y loading platform
| Drive motors | Stepper motor | | Drive control | The speed can be flexibly changed by moving up the X-y axis through
the software | | Size | 150 x 150 mm | | Maximum travel distance | 50 × 50mm in x-y direction | | Minimum travel distance | 1mm | | Movement speed | 1-10 mm/SEC, adjustable | | Displacement repetition accuracy | Less than 1 um - 3 um | | Object platform movement mode setting | Click any point in the interface through the mouse to automatically
select the point, you can set the starting position of the straight
line and set the random moving position, through the mouse click on
the automatic X-Y displacement platform loading platform for 8
directions of arbitrary movement control, can adjust the speed, can
be automatically reset, can be free to coordinate zero |
- Z axis auto focus component
| Motor | Stepper motor | | Maximum travel distance | The sample movement range of the hardness tester host | | Moving resolution | 0.1um | | Displacement repetition accuracy | 1um | | Movement speed | Fast/slow |
- Measurement and control software
| System description | Can carry out panoramic scan, edge scan.Automatic completion of
continuous pressure, load protection, reading, data recording, by
choosing a measurement method all measurement will be automatically
and quickly completed; Choose straight lines, zigzags, circles, arcs, random points,
matrices and self-learning modes according to different
needs;Improve the readability of non-clear indentation on
non-smooth surface by data processing software; The depth of hardened layer formed after continuous measurement can
be displayed in table form. It can output all kinds of data measurement data, hardness value
table, hardening layer depth, maximum value, average value, minimum
value. | | Hardness tester control | The hardness tester can be controlled automatically: automatic
turret (objective lens, pressure head, objective lens automatic
switch), automatic loading, automatic measurement control The brightness of the light source of the microhardness tester can
be set Select the conversion of the control objective lens and reflect it
in the software interface to change the calculation parameters Select or start control durometer indenter automatically to load
position, load, hold, unload, and automatically turn back to
measuring objective position The load set by the hardness tester can be automatically reflected
on the software interface | | Z axis control | Z axis automatic movement, automatic focus | | Control platform movement mode (Patten) | The software system can control the automatic loading platform for
programming and moving, and can carry out: 1) Measurement mode (Random A) Use this mode to press and read an optional point. 2) Measurement mode (Random B) Measure and read arbitrary points.Rotates the selected coordinate
position at any Angle. 3) Horizontal (X-axis direction) pressure and read 4) Longitudinal (Y-axis direction) pressure and reading 5) Measurement mode (Line Set A) Use this mode to press and read in the direction of the surface at
an Angle (zigzag movement, i.e. the broken line movement of the
hardened layer depth measurement). 6) Measurement mode (Line Set B) Use this mode to press and read at regular intervals. 7) Trajectory coordinate movement and other mobile programming
methods Above 8 lines can be set at the same time, each line can be set 999
positions | | Measuring way | Automatic mode: automatic loading + automatic measurement +
automatic display of measurement results Can measure the player's movement pattern | | Image acquisition/recognition methods | High quality, high resolution camera, resolution of 5 million,
large size original image acquisition;A variety of image
compression methods for easy use (the image and measurement results
for storage format, image storage format BMP, JPG and other general
file formats). Automatic vickers indentation measurement system using pixel
identification technology, through a dedicated vickers hardness
indentation analysis software to analyze indentation image, the
analysis software using digital image processing technology edge
segmentation algorithm to test indentation edge extraction, and
then by using the theory of wavelet multi-resolution analysis test
indentation sampling signal, using the least squares fitting
creasing edge line, In order to extract the indentation edge of
micro-hardness, the indentation area of micro-organization vickers
hardness test can be extracted quickly and accurately, and the
value of Vickers hardness can be calculated automatically, and the
readability of non-clear indentation on non-smooth surface can be
improved. | | Automatic measuring time | About 0.3 SEC /1 indentation | | Repeatability of measurement | ±1.0% (700HV/500gf) | | Minimum detectable indentation | About 5m (automatic measurement)m | | Minimum unit of measurement | 0.01mm | | language | English | Data output format / Editing features | Inspection report can be customized according to user requirements; Through data processing software, the depth of hardened layer
formed after continuous measurement can be displayed in table form. It can easily output all kinds of measurement data, hardness value
table, hardening layer depth, maximum value, average value, minimum
value, display and output color image with hardness value; Data such as hardness value, hardness table, hardening layer depth
map and picture insertion can be flexibly edited and printed in
"WORD" (optional "EXCEL"), including mathematical statistics and
hardening layer depth curve test report and saved (WORD format)
(optional "EXCEL"), also can print the observed sample topography
and save. The indentation and background microstructure are
directly reflected, and metallographic analysis and observation are
made under different magnification objective lens. |
5. Scope of supply: | | HVS -- AXYZF Automatic Vickers hardness measurement and control
system includes: | 1 set of | | 2-1 | Automatic loading platform (150 ×150 mm, X,Y stroke 50mm) | 1 | | 2-2 | Z-axis movement (stroke: sample movement range of hardness tester
host, built-in) | 1 | | 2-3 | X,Y, Z controller | 1 | | 2-4 | Brand computer | 1 | | 2-5 | Industrial digital camera 5 megapixels | 1 | | 2-6 | Optical adapter and type C interface | 1 | | 2-7 | Usb flash drive (with HVS-AXYZF software) | 1 |
6.Schematic diagram:
HUATEC Production line for hardness testers
|
