
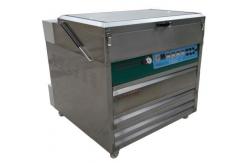
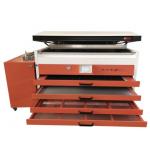
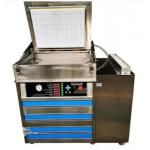
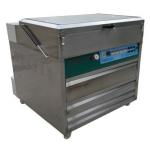
FP-900 Solvent Based Flexo CTP Plate Processor
|
|
FP-900 Solvent Based Flexo CTP Plate Processor
Application
Regardless of the PS plate or the CTP plate, a processing machine is required for processing the plate after the exposure is completed. EcooGraphix CTP Processor can be used with Offline/ Online Thermal CTP or CTCP or UV-CTP platesetters, such as Kodak, Screen, Agfa, Creo, Amsky or Cron CTP machines.
Machine Features
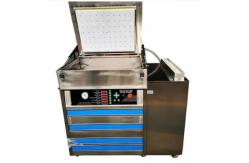
1. Multi-functional solvent-base flexo plate making machine, allows for exposure, wash-out, drying and de-tacking.
2. AIO design, save space, suitable for small format Flexo CTP Machine.
3. MPU central control panel makes operation easy.
4. Adopt imported UV lamps and electronic ballast.
5. Strong vacuum device and sucking air plate.
6. Circle thermostatic air drying device assures.
7. Accurate and stable re-productivity of the original colors and graphics.
Specification
Model FP-900
Max. 920mm*680mm
1.14mm - 3.94mm
Single phase 220V 50/60Hz
3.5KW
1650x1160x1300
Caution And Process
1) Do not run the feature of ‘water temperature’ before you and
solvent in the solvent tank. 2) Use three pin leg for the power supply of the machine, the power
supply must with the earth connection. 3) Don’t open the cover(Figure 1) when washing the resin plate. 4) The power supply is 220V 50-60Hz. 5) Keep it on for 20 minutes after you finished your work. The progress of working: 1. Adjust the brush Put the solvent into the solvent tank; and the level of the solvent
must lesser than the brush top (0.5-1.0cm). Then wet the brush with
solvent and close the cover. Observe the washing flat, if the four
sides of the washing flat have the solvent (it means the brush is
just touching the solvent), it is suitable for washing. If not, you
have to set the height of the brush. There is one fixable screw in
four side of the brush, set the height of the screw to adjust
the level of the brush till the brush is just touching the washing
flat. (Caution: It is better for you to use the water to replace
the solvent to adjust the level of the brush, but you have to put
the solvent to the solvent tank till the water is dry, because the
water and the solvent are not compatible, it means you have to wait
till the water is dry to use the machine). 2. The progress of operation (Figure 2): First, set the machine in the airy space and check the power supply
is working. Press the power (there is a power connection for all
section -- ‘power’, turn it on) to open the machine. Maybe it will
wink once because of the power but it is normal. 3. Set the parameter Press button 1 to choose up and press the button 5 to choose down
(choose the different feature). For example, press the button 5,
the light is winking in ‘Exposure time’, press it again it will
wink in ‘Wash-out time’ and so on. Set the parameter for all
functions. When the light is winking, press button 2 and 4 to
choose the digit (button 2 is to choose right, button is to choose
left). When the digit is winking you can set the parameter. Press
button 1 and 5 to add and reduce parameter (button 1 is to add
parameter; button 5 is to reduce the parameter). After the setting
you have to press button 3 (set) to fix the parameter that you had
chosen. After setting the parameter, you can press every function to run
it. When the working time is enough it will stop automatic and
voice out few times to show you the working (you can try and check
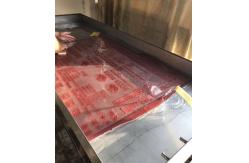
all functions to know it well before you use it). 4. Exposure function (Figure 1 and 2): Pull out the function 6 (Exposure section) and roll up the transparent plastic film. Put the film on your
resin plate and put it on the flat and press the button 6 (vacuum
button) and cover it with the transparent plastic film bit by bit
(so that the air will be made out better). (Caution: make sure that
your film and the transparent plastic film is clean, no water, no
dust no solvent and so on. The resin plate is a little bigger than
your film so that the vacuum pump can work better). Observe the
window of the vacuum pointer (it is in the right of the machine and
it shows the working of pump, the work is good when it is pointing
between 0.08 &-0.1) Push the Exposure flat into the machine and
press ‘Exposure time’ and it will work. When it is finished, it
will stop and voice out few times to show you the working. Pull out
the function 6 (exposure section) again and press button 6 to stop
the work of pump. Roll up the transparent plastic film and get the
film and resin plate. 5. Washing and drying (Figure 1 and 2) Paste the resin plate to the section 2 Washing flat and press the button ‘Wash-out time’ and close the cover. It will work. You have to watch it out when it is finished
(because it is not good for the resin plate and your finished goods
if the resin plate is in the solvent longer). The washing time is
3-6 minutes; it depends on the thickness of your resin plate. After
it is stopped, open the cover and test it whether is it clean or
not with you finger. Touch the blank area (no words and no picture
area), if it is sticky you can close the cover and wash it for a
while again till it is better (but the washing time is lesser is
better). After that get the resin plate out and put it into the
function 8 6. Drying section (before you use this function you have to run it 5-10 minutes
earlier so that the drying work will be better and faster). To sure
that the drying works is enough and it depends on the thickness of
your resin plate (if the thickness is thicker, like 3.94mm and the
drying time will be better for 1 hours long; If it is 1.7mm and 40
minutes is enough, it is not the only way to judge the drying time,
if the resin plate is straight, you do not need to wait to get the
resin plate out. It needs your experience). If the washing works is
not enough (there is somewhere is not clean and you can paste the
resin plate on the Washing flat to wash it again, but it is better
that it is finished once). 7. Second expose section (Figure 1 and 2) After drying, put the resin plate into the function 7 Second expose section and press the button ‘Second expose time’. Usually, the parameter
for it is 4-8 minutes; it depends on your experience and the resin
plate and so on. It is use to make the resin plate is steadier for
printing. 8. All are finished. After one or two years, the lambs will be weaker; you have to
change one new set exposure lamb. The lamb is use with Philip s 15W
exposure lamp. You can get it in your location. Change the lamp
(Figure 2). Pull out the function 6 Exposure section, after that you can pull out the control board and all constructs
of electronic design will show in front of you. It is easy for you
to change the new lamps for it. After 1 year, the oil in the pump is not enough, so that the
working of exposure is not good. If the oil is not enough, it
causes the sucking strength is lesser. It will influence the effect
of exposure. You have to check the oil of the pump. Open the cover
of the machine (it is in the back of the machine, it is use few
screws to fix the stainless steel clover into the machine). The
pump is fixed under it. There is a transparent window in the side
of the pump. When the level of the oil is under the red line, you
have to add some oil (the oil is special, it is use for the vacuum
pump only, you can buy it from the vacuum pump shop or somewhere,
it is very cheap) into the pump. Producing And Packaging
From producing to delivery, we make every details very carefully to guarantee the good product quality and service to customers.
Installation Cases
Certificates
FAQ
Q1: What are your main products ?
You can get the equipment and consumables all in one and no worry about the after-sales service from our company.
Q2: Where is your factory ?
Q3: Is there any certification for your CTP Processor ?
Q4: Can you also supply the Workflow and RIP ?
These end users printers all run the CTP systems with full satisfaction due to our robust quality, seamless remote service, thorough training and maintanence. If you are a printer who is considering purchasing directly from EcooGraphix China, there is no hassle on installations, training and after sales service. We guarantee your satisfaction.
|
||||||||||||||
| Product Tags: FP-900 CTP Plate Processor Solvent Based CTP Plate Processor Flexo CTP Plate Processor | ||||||||||||||
|
Wide Format CTP Plate Processor Automated Developing Machine |

|
Speed Adjustable CTP Plate Processors Wide Format Developing Machine |
|
FP-1400 Perfect CTP Plate Machine For Large Format Flexo Plate Processing |

|
FP 800 Drying And De Tacking Flexo CTP Plate Processor |
|
Drying and De-tacking Flexo CTP Plate Processor |
|
FP-900 Solvent Based Flexo CTP Plate Processor |