
DC24V XP Series Integrated PLC HMI With LCD Panel XP2-18RT-B
|

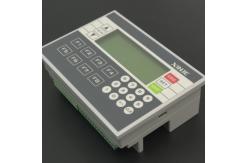
XP1 XP2 XP3-18RT XINJE XP Series Integrated PLC & HMI All In One With LCD Panel Xinje XP2-18RT-BThe XP/XMP integrated with XC series PLC. The function of PLC is the same as XC series. 1. XP1/XMP1 series include SFC instructions and applied instructions, exclude special function instructions. 2. XP2/XMP2 series and XP3/XMP3 series have the same instructions. They include SFC instructions, applied instructions and special function instructions. Please refer to XC Series PLC Manual: paragraph 4, 5, 6. Safety noticeRead the manual carefully before operating. Be aware of the safety and correct operation. The content below is focus on XP/XMP series products only. Please safekeeping the manual, put in somewhere easy to get and read and give the manual to final user.
◎ Notice items ◎ ATTENTION Do not put the wire close to cable, keep 10cm distance at least. Do not change the inside module of product or it may cause fault, error action, loss, fire. When it smelly or noisy, cut the power immediately ( short tweet after power on is normal ). Do not press the screen with pen, screwdriver or other sharp tools, it may cause screen break or error. For installing the product, tighten the screws to avoid loosing. Transport, install, store, assemble and maintain the product accurately to avoid breaking.
DANGEROUSNESS Confirm the power voltage and wire connection before turn on the power in order to avoid breaking Do not touch the connection point to avoid getting an electric shock Do not open the back cover board Cut all the power before installation and take-down to avoid error and fault Please use in the surrounding the manual stated to avoid accident Do not use the product under the condition of high frequency radiation, strong magnetic field to avoid interference
General Specifications
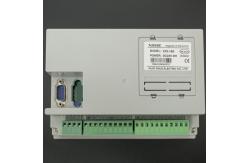
Note: model with "-S" represents the built-in clock and RS-485 communication port.
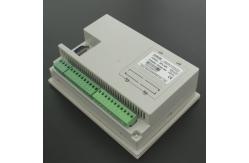
Product summarizationXP/XMP-18 series integral industrial controller integrated human machine interface (HMI) and PLC (XC1, XC2, XC3 series). It can instead of HMI and PLC to fulfill the control function. It can save space with slim outline and improve the convenience of maintenance.
Product characteristics
Special function instructionsXP2/XMP2 and XP3/XMP3 have special function instructions, please refer to XC Series PLC Operating Manual: paragraph 6. Here we only give the port definition and distribution.
1. High speed count
2. High speed pulse output
3. Interrupt function
4. Frequency measurement
The point is X1, X11, X12.
5. Pulse width modulation
The point is Y0, Y1.
6. Precise timer
32 bit precise timer, the timer range is T600 to T618, match with 10 interruption tag.
XP/XMP series soft component ID distribution list is as below: If extending BD board, the in-out point definition, please refer to XP Series Extended BD Board Manual.
NOTE: 1. The memorizer area in 【 】 is the defaulted power failure retentive area, the power failure retentive area of soft components D, M, S, T, C can be set via FD register. For the details, please see the following table. 2. Flash ROM register needn’t set power failure retentive area, its data won’t lose when 27 power is cut (No battery). 3. The serial number of input coil and output relay are octal data, other memorizers’ number are all decimal data. 4. There is no I/O point connected with exterior device can be used as interior relay.
Soft component power failure area setting:
NOTE: Users can set the power failure memory area, but the area can not over the soft component area.
The HMI part of XP/XMP used OP330/MP330 series display. The faceplate key-press function is as below:
Build a project:
We take XMP3-18R as an example to explain how to build a project.
1. build a new project Open the OP software, click “file”-“new project” or click “ ” to build a new project. 2. choose the display type In the “select model” window, choose the correct type of XP/XMP. For this example we select “MP330(XMP)”. 3. select PLC type As the XP/XMP is a integrated product of OP and XC, the OP will communicate with XC inside the product, the communication parameters are defaulted. 4. edit the screen After these three steps, we can enter screen editing mode. For the editing details, please refer to OP Series Display User Manual chapter 2.
Screen download:
1. Select com port Before downloading the screen, select the correct com port. The port is DB9 pins serial port of PC. The computer will select the port automatically, user only need to know the port number. If user can not confirm which port to use, try each port in file. If the com port is wrong, it will prompt you with the note “can not open”. 2. download Connect the XP/XMP DB9 pins com port and PC serial port using download cable. Power on the XP/XMP, click to start downloading.
Attention: (1) Do not cut the power when downloading, or you have to download again (2) The downloading cable of downloading OP screen is the same as downloading PLC program (3) Do not download when XCPPro and OP software are both opened
More Models:XP1-18R XP1-18T XP2-18R XP2-18RT XP2-18R-B XP2-18RT-B XP3-18R XP3-18T XP3-18RT ZP3-18T ZG1-20T-4 ZG3-20R-4 ZG3-20T-4 ZG3-30R-7 ZG3-30T-7 ZG3-30RT-7 ZGM-30T4-7
XP/ZG3 and ZGM Series PCL |
||||||||||||||||||||||||
| Product Tags: XP Series Integrated PLC HMI LCD Panel Integrated PLC HMI PLC Programmable Logic Controller DC24V |
|
Yamatake Azbil Temperature Controller C15MTV0TA0200 In Stock |
|
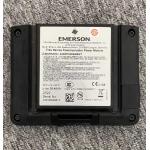
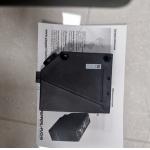
Emerson TREX TREX-0002-1211 Rechargeable Li-Ion Power Module IP54 |

|
Hot Sale Original New Mirror Reflection Type Photoelectric P+F RLK39-54Z31-40A-116 Cheap Stock |
|
Brand New Authentic RLK39-54-Z/31/40A/116 Diffuse Reflective Photoelectric Sensor |
|
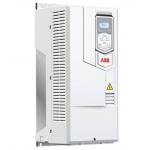
ABB ACS580-01-293A-4 LV AC General Purpose Wall Mounted Drive Drive |
|
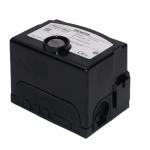
Siemens Used New Heating Elements Controller Models LME41.054A2 LME41.054C2 LME44.056C2 for Manufacturing Plant Restaurant |