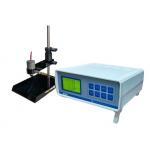
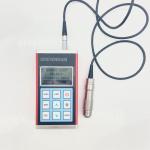
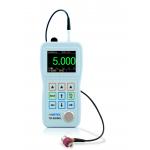
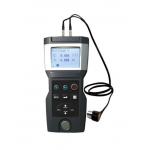
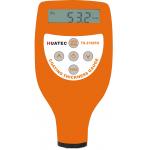
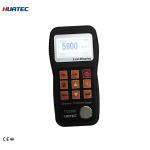
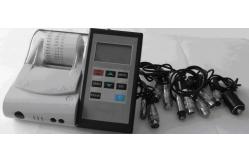
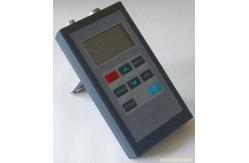
Coating Thickness Gauge TG8832FN with Printer in 7 types of probes
are available TG8832FNdigitalcoating thickness gauge is using the magnetism and
backset measuring thickness method .It can measure the thickness of
the magnetism metal substrate (such as steel, iron, alloy and rigid
magnetism steel and etc), non-magnetism cover layer (such as
aluminium, chrome, copper, enamel, rubber, oil paint and etc) and
non-magnetism metal substrate (such as copper, aluminium, zinc, tin
and etc) and non-transmitting electricity cover layer (such as
enamel, rubber, oil paint, plastic and etc). This instrument has
small error of measure, excellent performance and good stability,
easy operation and other characteristics, is a necessary measure
instrument to control and guarantee the product quality, can be
widely applied to manufacturing, metal processing industry,
chemical industry, merchandise test fields. Features - Precise measurements (2%+1)/(1%+1)
- Quick measuring response and rapid measuring speed
- Design of two independent parts , better applicability,
stable measurement results
- Strong data processing and analysis :5 types of Statistic
value and histogram
- 7 types of probes are available(F400, F1, F1/90°, N400, F10,
N1, CN02), suitable to requirements of different customers
- CTG Insight data processing platform , enable analysis and
management of data
Technical Specification Measuring range | F400 :0~400μm N400:0~400μm F1:0~1250μm F1/90:0~1250μm N1:0~1250μm F10:0~10000μm CN02:10~200μm | Measuring accuracy | F400, N400 1 point
calibration:±(2%+0.7)2 point calibration:±(1%+7)F1, F1/90, N1,
CN02 1 point calibration:±(2%+1)2 point
calibration:±(1%+1)F10
1 point
calibration:±(2%+10)
2 point calibration:±(1%+10) | Calibration | 1 point calibration /2 point calibration /basic calibration | Display resolution | 0.1um (0~99.9um) / 1um (Over 100um) | Weight | 250g(including battery package ) | Operation environment | Temperature: 0℃~50℃ humidity: 20%RH~90%RH | Operation mode | Direct testing mode and block statistics mode | Measuring mode | continuous/single | Shutdown mode | manual/automatic | Operation alarm | Ring music to alarm mistake | Signal Dealing | Threshold | Limits setting and automatically alarm measured values out of limit | Data analysis | Analyzing a batch of measuring values via histogram | Statistic function | Mean/ Standard deviation / Number of measurements/ Maximum/ Minimum | Data Merory | Thickness values | 500 measuring data | Delete | Single doubtful data / All data of one group | Input/Output | Print | measured values, statistic values, limit values and histogram | Communication | RS232/USB | Power supply | Battery | 9V Nickel-hydride/alkaline batteries | Power battery inspection | low voltage indication | Standard delivery | Main
unit | 1 | Integrated probe ((N1orF1) | 1 | Calibration foil set | 4 | Calibration base set | 1 | 9V alkaline battery | 1 | Instruction manual | 1 | Printer RD-E32-SN | 1 | Software CTG Insight | 1 | Optional accessories | probe | F400 F1 F1/90° F10 N400 N1 CN02 | Probe model | F400 | F1 | F1/90° | F10 | N400 | N1 | CN02 | | Working principle | magnetic induction | induced eddy current | | Measuring range(mm) | 0~400 | 0~1250 | 0~10000 | 0~400 | 0~1250 | 10~200 | | ( chromeplating upon copper base set 0~40) | | Resolution (mm) | 0.1 | 0.1 | 10 | 0.1 | 0.1 | 1 | | Tolerance | 1point calibration (mm) | ±(3%H+0.7) | ±(3%H+1) | ±(3%H+10) | ±(3%H+0.7) | ±(3%H+1.5) | ±(3%H+1) | | 2point calibration (mm) | ±(1%H+0.7) | ±((1%H+1) | ±(1%H+10) | ±(1%H+0.7) | ±(1%H+1.5) | -------- | | Measuring condition | Min curvature radius (mm) | convex | 1 | 1.5 | flat | 10 | convex | 1.5 | 3 | flat | Only flat | | Min
measure area(mm) | F3 | F7 | F7 | F4 | F4 | F5 | F5 | F7 | | Critical substrate thickness(mm) | 0.2 | 0.5 | 0.5 | 2 | 0.3 | 0.3 | 0.3 | No limit | |
|
