
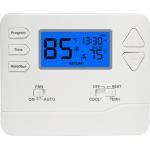
Easy install 230V Non-programmable LCD Display Smart Home Thermostat
|


|
Easy install 230V Non-programmable LCD Display Smart Home Thermostat
Features:
Digital thermostat
Model No.:ST2601
Relay Wiring
1(NC),2(COM),3(NO)
Heating: connect the two connection wires of the device to be controlled to terminals No. 3 (NO) and No. 2 (COM), i.e. to the normally open terminals of the relay Cooling: the two connection wires of the cooling equipment should be connected to terminals No. 2 (COM) and No. 1 (NC), i.e. to the normally closed terminals of the relay.
• To prevent electric shock, replace the inner cover removed for the connection of wires after the assembling process has been completed.
The device must be installed and connected by a qualified professional. Always follow the manufacturer's instructions when connecting the thermostat to any heating or cooling appliance.
The voltage appearing at terminal No. 1, No. 2 or No. 3 depends only on the system being controlled, therefore the dimensions of the wire are determined by the type of the device to be controlled. The length of the wire is of no significance.
Running Mode
Hold the dial button for 5 seconds to access the system running mode switch, then turn the dial to choose different mode between:
-- HEAT (Heating): adjust the temperature by turn the dial -- COOL (Cooling): adjust the temperature by turn the dial -- OFF (Frost Protection): it will start heating when the room temperature is under 7°C
Then press the dial again to confirm the running mode or wait for 10 seconds to confirm the setting automatically.
Calibrate the temperature
Temperature calibration and SWING settings): Hold the dial for 5 seconds to access to the mode switch setting and select HEAT or COOL mode, then press the dial to access the interface of temperature calibration “CAL” (in -3.0~+3.0, in 0.5°C increments); turn the dial to set the desired value, then press the dial again to set the Swing value between 0.2~2°C.
Restoring thermostat to factory default
Remove the batteries then put it back, hold the dial until display the full screen then release, the defaul running mode is HEAT, it means the thermostat has been restored to factory default settings.
|
||||||||||||||||||||||
| Product Tags: Easy install smart home Thermostat 230V smart home Thermostat |

|
Riseem ST2403RF Non-Programmable 868MHz Boiler Digital Heating Wireless RF Thermostat |
|
Energy Saving 230V Electronic Weekly Programmable Single Stage 1 Heat 1 Cool Boiler Electronic Wired Home Thermostat for Temperature Control |
|
Stable Wireless Room Thermostat With Blue Backlight 7 Day Programmable |
|
LCD Display Digital Room Thermostat For Energy Saving And Optimal Temperature Control Function |

|
Energy Saving Room Heating Thermostat ±1C Accuracy Lower Energy Costs |

|
Non-Programmable White Digital Room Thermostat For Temperature Control Efficiency |